内容
在Ubuntu 22.04 系统上 部署 ComfyUI,在国内网络环境手动安装comfyui manager以拓展额外功能(custom nodes),手动安装custom nodes。
官方文档: ComfyUI
安装
- 首先确认服务器上已经有conda环境并创造一个环境。
# 下载comfyui 的git仓库
git clone https://github.com/Comfy-Org/ComfyUI.git
# 下载安装依赖
cd ComfyUI
conda activate comfyui_env
pip install -r requirements.txt
# 启动ComfyUI并指定端口号和使用的gpu
python main.py --listen --port 10020 --cuda-device 0
安装ComfyUI Manager
# 切换到子目录
cd custom_nodes
# 如果网络环境无限制
git clone https://github.com/ltdrdata/ComfyUI-Manager.git
# 如果网络环境有限制
手动下载[仓库](https://github.com/Comfy-Org/ComfyUI-Manager), 解压并重命名为comfyui-manager,放入custom_nodes
# 重新启动comfyui即可
python main.py --listen --port 10020 --cuda-device 0
安装任何插件
- 如果ComfyUI Manager GUI 可以下载nodes
- 如果ComfyUI Manager GUI 一直下载不了nodes
# 下载对应的git仓库,重命名后放入custom_nodes
git clone https://github.com/some/custom/nodes.git

# 进入这个node的目录然后安装依赖
pip install -r requirements.txt

# 重新启动comfyui

# 一些常用的custom nodes:
--Control Net:  https://github.com/Fannovel16/comfyui_controlnet_aux
--ComfyUI-Impact-Pack:  https://github.com/ltdrdata/ComfyUI-Impact-Pack
--rgthree-comfy:  https://github.com/rgthree/rgthree-comfy
快速上手
- 最广泛使用的文生图模型是flux模型,利用它搭建一个工作流是一个不错的起点。
- 使用comfyui生成的图片自带工作流信息,可以直接拖进GUI形成工作流。
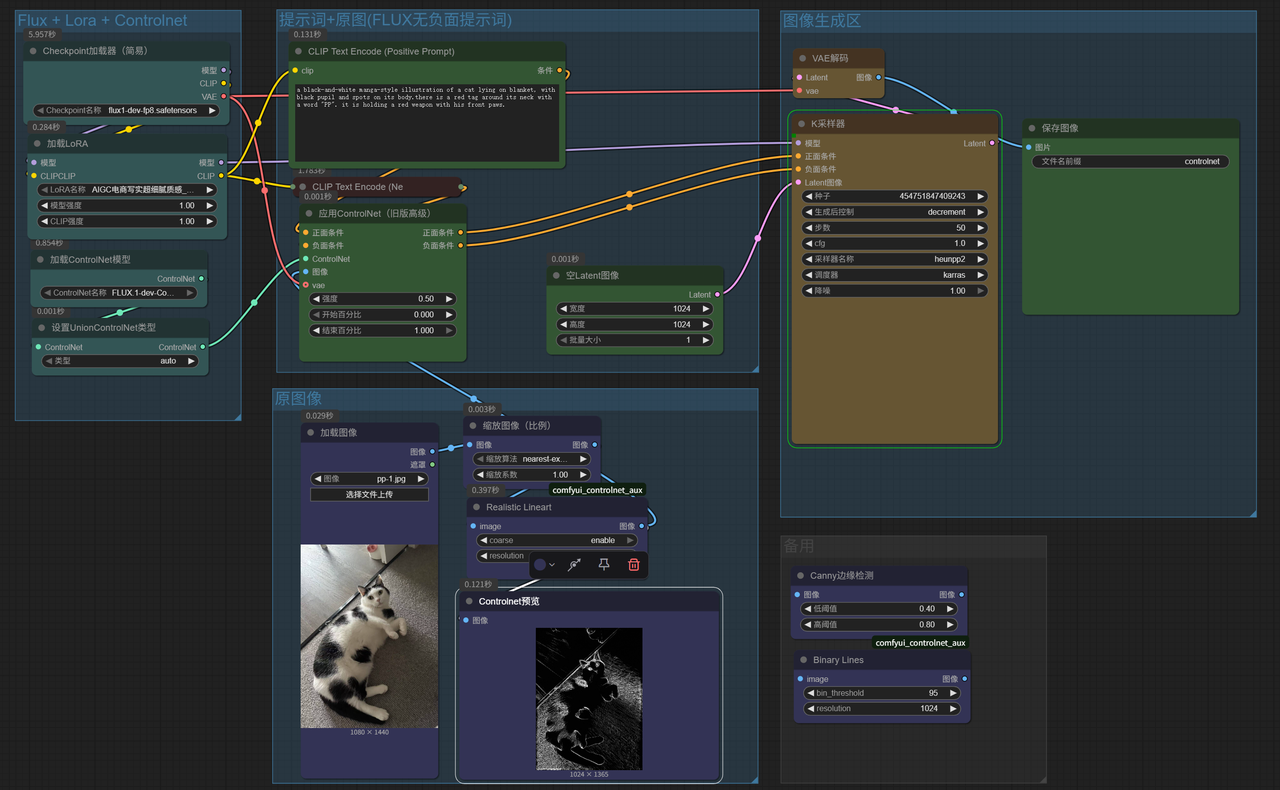
- 示例1:flux + lora + controlnet 工作流
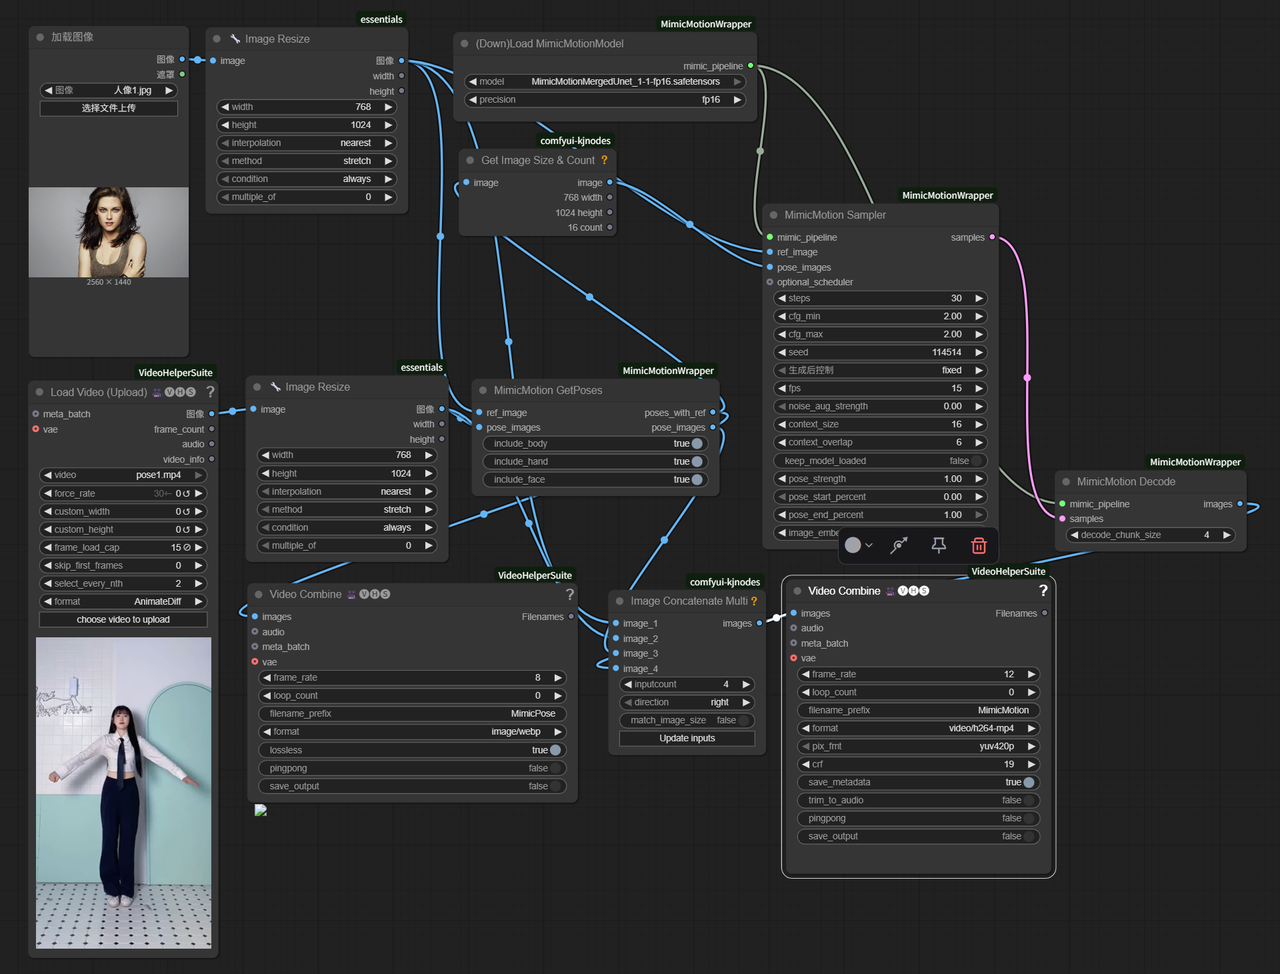
- 示例2: mimicmotion 动作模仿视频工作流